Introduction
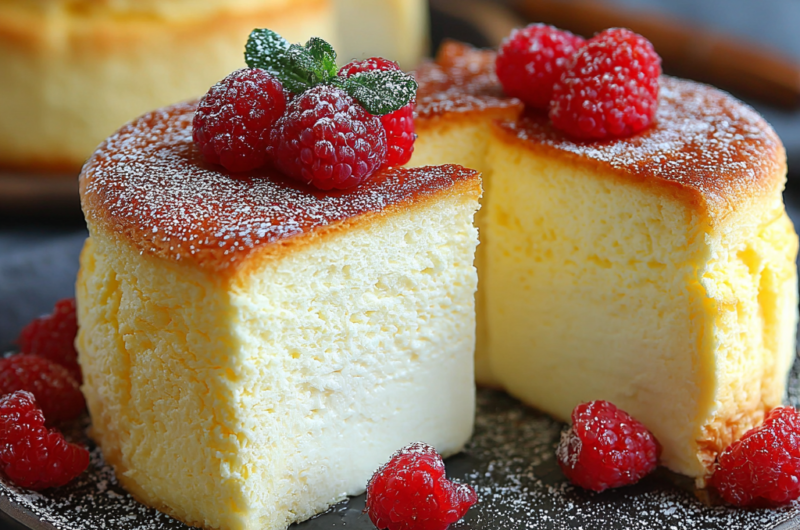
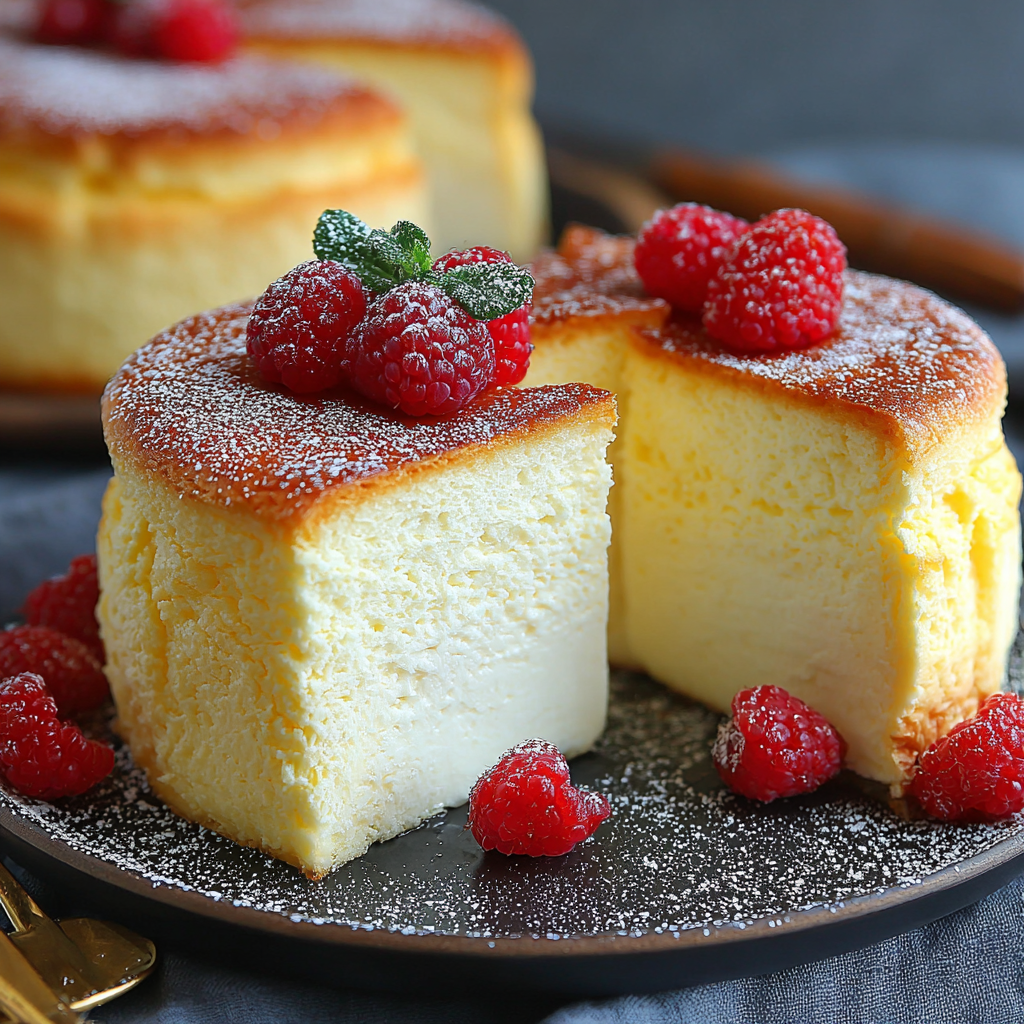
Japanese cheesecake is a delightfully airy and fluffy dessert that combines the richness of cream cheese with the lightness of a soufflé. Unlike traditional cheesecake, its texture is light and jiggles tantalizingly, making it a refreshing end to any meal.
Originating in Japan, this dessert has been gaining popularity worldwide due to its unique texture and flavor profile. The delicate balance of sweetness and creaminess makes it irresistible, compelling many home cooks to try their hand at making it.
Achieving the perfect Japanese cheesecake might seem daunting, but with the right ingredients and techniques, you can create a beautiful and delicious treat that will impress your family and friends.
Ingredients
- 200g cream cheese
Cream cheese provides the rich, creamy base of the cheesecake. Its smooth texture ensures that the cheesecake is decadent yet light when combined with the other ingredients. - 50g unsalted butter
Butter adds moisture and richness, contributing to the luxurious flavor of the cheesecake. It also helps in creating a soft texture when combined with the cream cheese. - 120ml whole milk
Whole milk enhances the creaminess of the cheesecake, preventing it from being too dense. It also helps in emulsifying the batter, contributing to a smooth and velvety consistency. - 60g granulated sugar
Sugar balances the flavors and aids in creating a light texture. It also caramelizes slightly during baking, enhancing the overall taste with a hint of warmth and complexity. - 3 large eggs, separated
Eggs are vital for structure and stability. The egg whites are whipped to incorporate air, providing lift and creating that signature soufflé-like texture, while the yolks add richness to the batter. - 1 tablespoon lemon juice
Lemon juice adds a subtle tang that brightens the flavor of the cheesecake. It also helps to cut through the richness, ensuring the dessert is not overly heavy. - 30g all-purpose flour
Flour provides a small amount of structure to the cheesecake, allowing it to hold its shape. Using a minimal amount keeps the texture light and fluffy. - 1/4 teaspoon cream of tartar
Cream of tartar stabilizes the whipped egg whites, helping them maintain their volume and structure. This is crucial for achieving the light texture characteristic of Japanese cheesecake.
Directions & Preparation
Step 1: Preheat the oven to 160°C (320°F).
Preheating your oven ensures even baking from the start, which is crucial for the rise and texture of the cheesecake. A hot oven creates the ideal environment for the soufflé-like consistency, preventing dense spots in the cake.
Step 2: Prepare the baking pan with parchment paper.
Lining your pan with parchment paper helps the cheesecake release easily after baking. It also ensures uniform baking since the batter won’t stick, which could otherwise compromise the delicate texture.
Step 3: Melt the cream cheese and butter together in a double boiler.
Gently melting these ingredients ensures they blend smoothly, preventing the creation of lumps. This step is essential for the creamy consistency that characterizes the final product; overheating can cause separation, so keep the heat low.
Step 4: Add milk, sugar, and lemon juice to the melted mixture, whisking until combined.
Incorporating these ingredients into the warm mixture allows them to dissolve fully, creating a smooth batter. The warmth helps in emulsifying the mixture, which is crucial for achieving a consistent and airy texture.
Step 5: Remove the mixture from heat and let it cool slightly before adding the egg yolks.
Allowing the mixture to cool slightly prevents the yolks from scrambling when added. This step is vital; if the mixture is too hot, it will negatively affect the texture and flavor of the cheesecake.
Step 6: Whisk in the egg yolks and flour until smooth.
This step combines the primary ingredients of the batter while ensuring a silky texture. Mixing until completely smooth is important to prevent any lumps, which can disrupt the light consistency of the finished cake.
Step 7: In a separate bowl, whip the egg whites with cream of tartar until stiff peaks form.
Whipping the egg whites with cream of tartar creates a stable foam that gives the cheesecake its lightness. The stiff peaks indicate readiness; under-whipping can lead to a dense texture, while over-whipping can create a dry cake.
Step 8: Gently fold the egg whites into the cream cheese mixture in three additions.
Folding in the egg whites ensures that the air you've incorporated isn't lost. This gentle technique is crucial to maintaining volume; over-mixing can deflate the batter and result in a dense cheesecake.
Step 9: Pour the batter into the prepared pan and smooth the surface.
Smoothing the surface helps in achieving an even top while baking. This step ensures that any air pockets are minimized, resulting in a beautiful final presentation.
Step 10: Bake in a water bath for about 50-60 minutes, or until set.
Baking in a water bath regulates the temperature and prevents the cheesecake from cracking. The steam helps to create a moist environment that contributes to the light texture; checking for a slight jiggle in the center signifies it’s done.
Step 11: Turn off the oven and let the cheesecake cool inside for 30 minutes.
Allowing the cheesecake to cool gradually in the oven helps prevent sudden temperature changes that can cause cracks. This step ensures a smooth and silky finish, allowing the flavors to meld beautifully.
Step 12: Remove from the oven and let it cool completely at room temperature.
Cooling the cheesecake slowly at room temperature helps to further stabilize its texture. This step is essential for achieving the perfect slice, as rapid cooling can lead to a rubbery texture.
Step 13: Refrigerate for at least 4 hours, preferably overnight.
Chilling the cheesecake solidifies its structure and enhances the flavors. The extended time in the refrigerator allows the cheesecake to achieve its signature creamy texture and removes any residual warmth from baking.
Step 14: Serve with a dusting of powdered sugar or fresh fruit, if desired.
Garnishing with powdered sugar or fruit adds a touch of elegance and extra flavor. The sweetness of the sugar or the tartness of the fruit complements the cheesecake, enhancing the overall dining experience.

The Science Behind the Fluffiness
The secret to Japanese cheesecake's light texture lies in the careful handling of egg whites. By whipping them to stiff peaks and folding them into the batter, you incorporate air, which helps the cake rise beautifully. This method creates a soft and airy crumb, distinguishing it from denser varieties of cheesecake. The balance of ingredients, particularly the modest amount of flour, also plays a vital role in achieving that soufflé-like quality.
Troubleshooting Common Issues
If your Japanese cheesecake turns out too dense, you might have overmixed the batter or not incorporated enough air during the folding process. Ensure you gently fold the whipped egg whites rather than stirring, as this preserves the air you’ve worked to add. Additionally, always check your oven temperature; fluctuations can lead to uneven baking affecting the texture of your cake.
Serving Suggestions for a Perfect Finish
Japanese cheesecake is delicious on its own but pairs wonderfully with various accompaniments. A light fruit compote or fresh berries can add a refreshing contrast to the rich flavors. For a simple serving idea, dust the cheesecake with powdered sugar before cutting, creating a beautiful presentation. Optional toppings might include a drizzle of honey or a dollop of whipped cream for additional indulgence.
FAQs
Why did my cheesecake rise too much during baking?
Over-whipping the egg whites can lead to excessive air and cause the cheesecake to rise too rapidly. Ensure you whip just to stiff peaks and fold gently.
What should I do if my cheesecake is too bland?
If your cheesecake lacks flavor, you can add a pinch of salt to enhance the sweetness or a bit more lemon juice for a brighter taste. Adjust the sugar accordingly if you do.
My cheesecake cracked; what went wrong?
Cracks can form if the cheesecake cools too quickly or if it was overbaked. Baking in a water bath and allowing it to cool gradually help prevent this issue.
Can I reduce the sugar in this recipe?
Yes, you can scale back the sugar slightly, but be cautious as it affects both flavor and texture. Reducing too much may compromise the overall balance.
What if my cheesecake is too thick after baking?
If your cheesecake is overly thick, it may be due to insufficient whipping of the egg whites. Ensure they reach stiff peaks and are well incorporated into the batter.
How can I enhance the flavor of the cheesecake?
Consider adding vanilla extract or almond extract to the batter for added depth. Just a teaspoon can elevate the overall flavor without overpowering the classic taste.
Conclusion
Making Japanese cheesecake at home can be a rewarding endeavor, yielding a dessert that is as delightful to present as it is to eat. By following the outlined steps and paying attention to the details, anyone can achieve success.
With a few practice runs, you'll discover the nuances of this beautiful dessert, turning it into a staple for gatherings and special occasions alike. The airy texture coupled with a subtle sweetness is sure to impress anyone who tries your homemade creation.
Recipe Card
Mastering the Art of Japanese Cheesecake at Home
Ingredients
Method
- Preheat the oven to 160°C (320°F).
- Prepare the baking pan with parchment paper.
- Melt the cream cheese and butter together in a double boiler.
- Add milk, sugar, and lemon juice to the melted mixture, whisking until combined.
- Remove the mixture from heat and let it cool slightly before adding the egg yolks.
- Whisk in the egg yolks and flour until smooth.
- In a separate bowl, whip the egg whites with cream of tartar until stiff peaks form.
- Gently fold the egg whites into the cream cheese mixture in three additions.
- Pour the batter into the prepared pan and smooth the surface.
- Bake in a water bath for about 50-60 minutes, or until set.
- Turn off the oven and let the cheesecake cool inside for 30 minutes.
- Remove from the oven and let it cool completely at room temperature.
- Refrigerate for at least 4 hours, preferably overnight.
- Serve with a dusting of powdered sugar or fresh fruit, if desired.
Notes
Additional serving suggestions: pair with a crisp salad, garlic bread, or roasted seasonal vegetables for balance.
For make-ahead, prep components separately and assemble just before heating to preserve texture.
Taste and adjust with acid (lemon/vinegar) and salt right at the end to wake up flavors.