Introduction
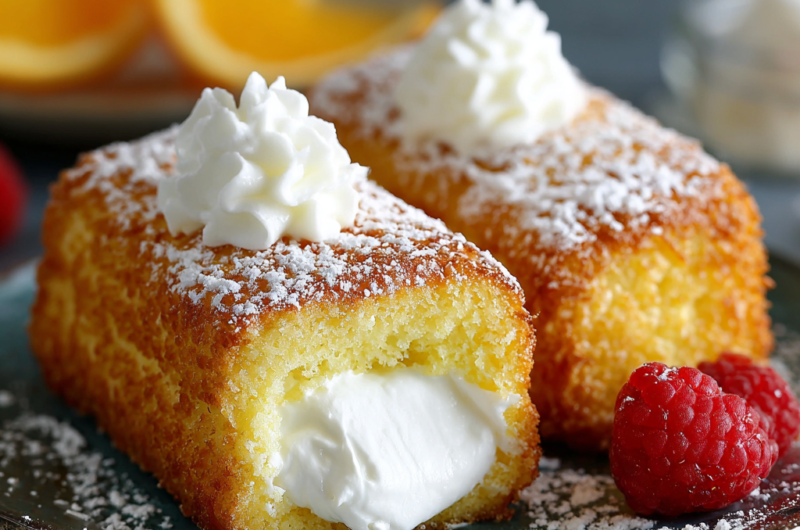
Homemade Twinkies evoke memories of childhood treats, inviting you to indulge in their sweet nostalgia. Crafting these iconic cream-filled cakes from scratch allows you to control the flavors and quality of ingredients, ensuring a delightful experience with every bite.
With their light, fluffy texture and creamy filling, Twinkies are perfect for dessert or a midday snack. This recipe reveals the secrets behind achieving that signature sponge cake and a light, silky filling that rivals the store-bought version, providing a delicious treat your family will adore.
Ingredients
- 1 cup all-purpose flour
Flour provides the structure for the cake, giving it a light yet sturdy body. It helps create that desirable sponge texture when combined properly with other ingredients. - 1 teaspoon baking powder
Baking powder acts as a leavening agent, helping the cake rise and become fluffy during baking. It creates air pockets that contribute to the light texture of Twinkies. - 1/4 teaspoon salt
Salt enhances the overall flavor of the cake, balancing sweetness and drawing out the cake's natural flavors. It also strengthens the gluten structure, aiding in the cake's texture. - 1/2 cup unsalted butter
Butter adds richness while also contributing to a tender crumb in the cake. Its fat content helps to moisten the cake and create a satisfying mouthfeel. - 1 cup granulated sugar
Sugar not only sweetens the Twinkies but also plays a crucial role in the texture. It helps create a light, airy cake through the creaming process with butter. - 2 large eggs
Eggs provide moisture, richness, and structure to the cake. They also help in binding the ingredients together and contribute to the cake's rise. - 1 teaspoon vanilla extract
Vanilla extract imparts a wonderful aroma and flavor, making the cakes more appealing. This subtle flavor complements the sweetness of the cake. - 1/2 cup whole milk
Milk adds moisture to the batter, ensuring a soft texture. It also helps activate the baking powder, further aiding the rise of the cakes. - 2 cups powdered sugar
Powdered sugar is key for making the filling sweet and creamy while helping it maintain a smooth texture. Its fine granules dissolve quickly, creating a luscious cream. - 1/4 cup vegetable shortening
Shortening provides stability to the filling, making it easy to pipe into the cakes. It ensures the filling maintains its shape without becoming too soft. - 1 teaspoon vanilla extract for filling
Similar to the cake batter, vanilla extract in the filling enhances flavor, adding depth and richness to the overall dessert.
Directions & Preparation
Step 1: Preheat your oven to 350°F (175°C).
Preheating the oven is crucial for achieving a uniform bake. Starting with a proper temperature ensures the cake rises correctly and bakes evenly, giving you that perfect sponge texture you aim for.
Step 2: In a bowl, whisk together flour, baking powder, and salt.
Combining these dry ingredients first ensures that the baking powder is evenly dispersed throughout the flour. This step prevents any lumps and guarantees a consistent rise across all mini cakes.
Step 3: In a separate bowl, cream the butter and sugar until light and fluffy.
Creaming butter and sugar introduces air into the mixture, which is essential for achieving a light and airy cake. The fluffy texture will result from the proper incorporation of these ingredients, so beat them well.
Step 4: Add eggs one at a time, mixing well after each addition, followed by the vanilla extract.
Incorporating eggs one by one helps emulsify the fats and liquids, ensuring a smooth batter. This step is critical in preventing the mixture from curdling and ensures a well-mixed batter.
Step 5: Gradually add the dry ingredients to the wet mixture, alternating with the milk, mixing until just combined.
Alternating dry and wet ingredients helps maintain the batter’s texture and prevents overmixing, which can result in a tough cake. Be sure to mix until just combined to retain that light quality.
Step 6: Divide the batter into greased Twinkie molds, filling them about two-thirds full.
Filling the molds appropriately allows for optimal rising without overflow. Make sure to smooth the tops for an even finish, which will also help with the aesthetics once baked.
Step 7: Bake for 12-15 minutes, until golden and a toothpick inserted comes out clean.
Baking time can vary based on your oven and the precise size of your molds. Check for doneness by using a toothpick; it should come out clean or with a few moist crumbs for the perfect texture.
Step 8: Remove from the oven and let them cool in the molds for 5 minutes before transferring to a wire rack to cool completely.
Cooling in the molds initially helps prevent the cakes from breaking. Once they are a bit firmer, transferring to a wire rack allows for even cooling, preventing any sogginess from steam.
Step 9: While the cakes cool, prepare the filling by beating together the shortening, powdered sugar, and vanilla extract until smooth and fluffy.
Allowing the filling to reach a fluffy consistency ensures that it pipes smoothly into each cake without being too runny or thick. This texture will match perfectly with the light cakes.
Step 10: Once cool, use a long, thin piping tip to fill each cake with the cream filling.
Filling the cakes properly is critical for achieving that iconic Twinkie experience. A piping tip allows for a clean, controlled flow of the filling, ensuring each bite is filled with creamy goodness.
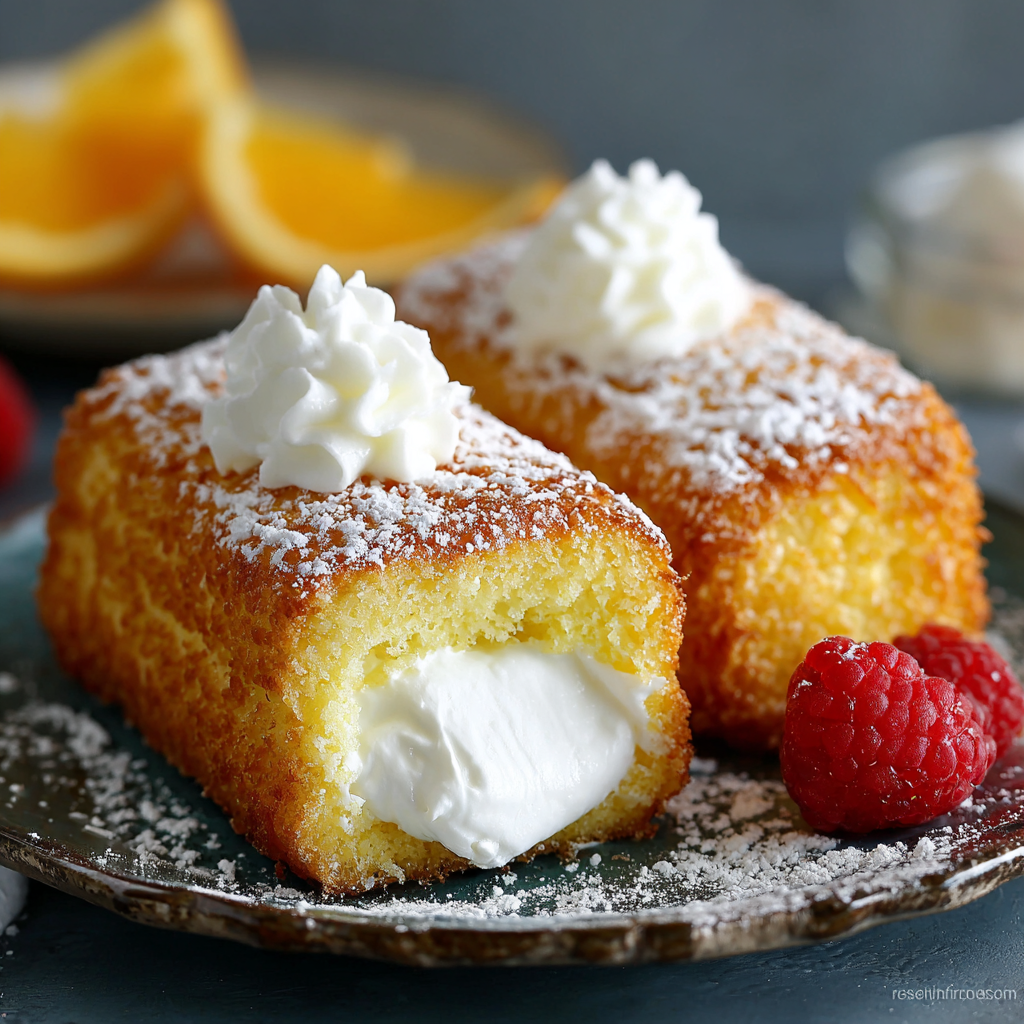
Step 11: Serve and enjoy your homemade Twinkies!
Serving these freshly made Twinkies is the ultimate reward for your baking effort. Share them with friends or savor the nostalgic flavors on your own; either way, they are sure to be a hit.

The History of Twinkies
Twinkies were first created in the 1930s as a way to utilize a surplus of shortcake pans. Their iconic spongy texture and cream filling quickly gained popularity, becoming a staple snack across the United States. With their interesting history as a product that survived even difficult economic times, Twinkies have woven themselves into American culture.
Flavor Variations to Explore
While vanilla filling is traditional, there are numerous flavor combinations you can experiment with. Consider adding cocoa powder for a chocolate filling or incorporating fruit purees for a fruity twist. This versatility allows bakers to personalize their homemade Twinkies according to their tastes or seasonal ingredients.
Perfecting Your Sponge Cake
Sponge cake is all about the technique. To achieve that desired texture, the creaming of butter and sugar together cannot be skipped, as it develops air pockets that are crucial for lightness. Monitoring your baking time and cooling the cakes properly ensure they maintain the sponge quality and do not become dense.
FAQs
What if my batter is too thick?
If your batter seems too thick, you can add a tablespoon of milk at a time until you reach the desired consistency. This should help loosen it without compromising the cake's texture.
What should I do if the cakes overflow in the oven?
If the cakes overflow, it could be due to overfilling the molds. Always fill them to about two-thirds to allow for rising and expansion. Next time, try measuring more carefully.
Can I add food color to the filling?
Absolutely! Adding a few drops of food coloring can give your filling a fun twist, especially if you're making them for a special occasion.
Why are my cakes too dry or crumbly?
This can occur if the cakes were overbaked or if the batter was overmixed. Consider checking the oven temperature accuracy and reducing mixing time after adding flour.
What can I use instead of shortening in the filling?
You can use unsalted butter as a substitute for shortening, but be aware that it may yield a softer filling that could need more refrigeration to hold its shape.
How can I make the Twinkies chocolate-flavored?
For chocolate Twinkies, you can substitute 1/4 cup of the flour with cocoa powder in the batter and add a chocolate element to the cream filling. Adjust the sugar accordingly to balance the flavor.
Conclusion
Creating homemade Twinkies is not only a rewarding baking project but also a way to relive cherished memories through food. With a few basic ingredients and some care in preparation, you can enjoy a treat that’s both delightful and nostalgic.
Whether you stick to the classic flavors or venture out to create your own variations, these delectable cakes are sure to bring joy to both bakers and eaters alike. Dive into the world of homemade Twinkies and discover your new favorite dessert!
Recipe Card
Homemade Twinkies: A Nostalgic Treat from Scratch
Ingredients
Method
- Preheat your oven to 350°F (175°C).
- In a bowl, whisk together flour, baking powder, and salt.
- In a separate bowl, cream the butter and sugar until light and fluffy.
- Add eggs one at a time, mixing well after each addition, followed by the vanilla extract.
- Gradually add the dry ingredients to the wet mixture, alternating with the milk, mixing until just combined.
- Divide the batter into greased Twinkie molds, filling them about two-thirds full.
- Bake for 12-15 minutes, until golden and a toothpick inserted comes out clean.
- Remove from the oven and let them cool in the molds for 5 minutes before transferring to a wire rack to cool completely.
- While the cakes cool, prepare the filling by beating together the shortening, powdered sugar, and vanilla extract until smooth and fluffy.
- Once cool, use a long, thin piping tip to fill each cake with the cream filling.
- Serve and enjoy your homemade Twinkies!
Notes
Additional serving suggestions: pair with a crisp salad, garlic bread, or roasted seasonal vegetables for balance.
For make-ahead, prep components separately and assemble just before heating to preserve texture.
Taste and adjust with acid (lemon/vinegar) and salt right at the end to wake up flavors.