Introduction
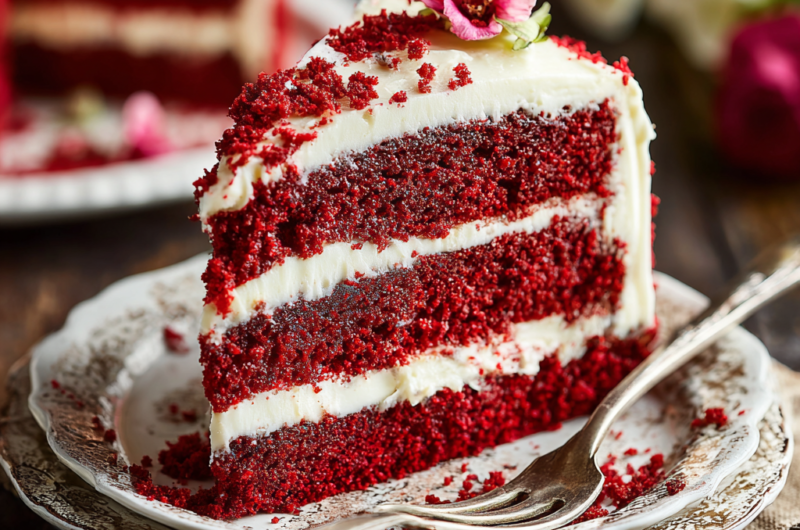
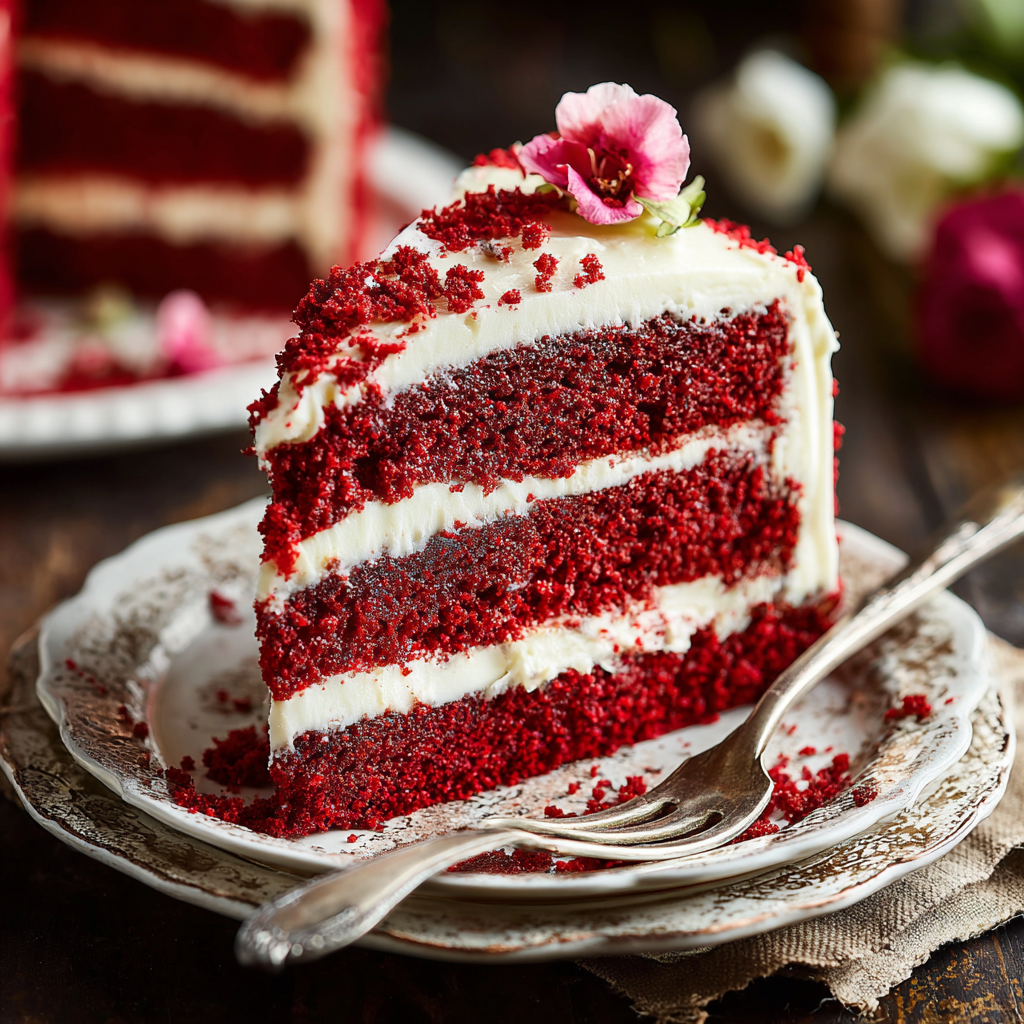
Red velvet cake is a timeless classic that captivates both the eyes and the taste buds. Its striking red hue, paired with a subtle cocoa flavor and velvety texture, makes it a sought-after dessert for any celebration. But it's the combination of flavors and beautiful presentation that truly sets it apart.
Originating in the early 20th century, red velvet cake has evolved from a simple layer cake into a beloved staple, often seen at weddings and birthdays. The recipe is a beautiful balance of buttermilk tang, cocoa subtlety, and a touch of vanilla, all wrapped in cream cheese frosting that complements the cake's richness perfectly.
Whether you're baking for a special occasion or just indulging in some well-deserved self-care, this Red Velvet Cake recipe will guide you through creating something truly extraordinary. Let's dive into the ingredients and methods that will make this cake a showstopper.
Ingredients
- 2 1/2 cups all-purpose flour
All-purpose flour provides the structure for the cake, allowing it to rise and maintain a lovely crumb. Using a higher protein flour helps achieve that classic soft texture that red velvet cakes are known for. - 1 1/2 cups granulated sugar
Sugar sweetens the cake and also helps to achieve a moist texture. As it melts during baking, it contributes to the cake's overall tenderness. - 1 teaspoon baking soda
Baking soda acts as a leavening agent, helping the cake rise. The acid from buttermilk activates the baking soda, contributing to the cake’s fluffy texture. - 1 teaspoon salt
Salt enhances all the flavors in the cake, balancing the sweetness of the sugar and the richness of the cocoa. It's a critical component that shouldn’t be overlooked. - 1 teaspoon cocoa powder
Cocoa powder adds a subtle chocolate flavor that enhances the cake’s complexity, making it more interesting than just a plain vanilla cake. - 1 cup vegetable oil
Vegetable oil keeps the cake moist and tender. Unlike butter, it helps create a softer texture due to its liquid state at room temperature. - 1 cup buttermilk, at room temperature
Buttermilk contributes to the cake's tangy flavor and also helps to tenderize the gluten in the flour, creating a soft texture. - 2 large eggs
Eggs provide structure and stability to the cake, as well as moisture. They help bind the ingredients together and contribute to the cake's richness. - 2 tablespoons red food coloring
Red food coloring gives the cake its signature hue. It's essential not just for aesthetics but also for traditional flavor and texture balance. - 1 teaspoon vanilla extract
Vanilla extract adds warm, sweet undertones that balance and round out the flavor profile of the cake. - 1/2 cup cream cheese, softened
Used in the frosting, cream cheese adds richness and tanginess, perfectly complementing the sweet layers of the cake. - 2 cups powdered sugar
Powdered sugar sweetens the frosting and aids in achieving a smooth, spreadable consistency. It helps balance the tanginess of the cream cheese. - 1/4 cup unsalted butter, softened
Butter contributes to the richness and flavor of the frosting, creating a luxurious mouthfeel and better structure. - 1 teaspoon vanilla extract (for frosting)
Vanilla in the frosting ties the flavors together, enhancing the sweetness without overpowering the unique taste of the cream cheese.
Directions & Preparation
Step 1: Preheat your oven to 350°F (175°C).
Preheating your oven ensures that the cake bakes evenly. Starting with a hot oven helps the cake rise properly, which is essential for achieving that tender, fluffy texture that red velvet is known for.
Step 2: Prepare your cake pans by greasing them and placing parchment paper at the bottom.
Greasing the pans prevents the cake from sticking, which is crucial for a smooth release. Parchment paper adds extra protection, ensuring that all parts of the cake come out intact, preserving the lovely shape.
Step 3: In a large bowl, sift together the flour, cocoa powder, baking soda, and salt.
Sifting the dry ingredients breaks up any lumps in the flour and cocoa, leading to a more even distribution throughout the batter. This step also aerates the flour, helping ensure your cake remains light and fluffy.
Step 4: In another bowl, whisk together the oil and sugar until well combined.
Creaming the oil and sugar together incorporates air into the mixture, which helps to create a lighter, fluffier batter. This process is vital for achieving the desired texture in your cake.
Step 5: Add the eggs, buttermilk, food coloring, and vanilla extract to the oil mixture, mixing until smooth.
Adding these wet ingredients creates an emulsion that binds the dry ingredients during mixing. This is essential for creating a consistent batter, ensuring that every slice holds true to the rich flavor of red velvet.
Step 6: Gradually add the dry mixture to the wet ingredients, mixing until just combined.
Mixing until just combined prevents overworking the batter, which can lead to a dense texture. Aim for a smooth batter with minimal lumps, but don’t worry about complete uniformity.
Step 7: Divide the batter evenly between the prepared cake pans.
Ensuring equal distribution of the batter in your pans guarantees even baking. This helps avoid a situation where one cake layer is thicker or denser than the other, providing a balanced final dessert.
Step 8: Bake in the preheated oven for 25-30 minutes, or until a toothpick inserted comes out clean.
Baking time is crucial; underbaking can lead to a wet texture, while overbaking dries the cake out. Regularly check for doneness, as ovens vary. Remove the cakes when they spring back to the touch.
Step 9: Let the cakes cool in the pans for 10 minutes, then turn them out onto wire racks to cool completely.
Cooling the cakes in the pans initially helps them set, preventing breakage. Transferring to wire racks allows for adequate air circulation, crucial for even cooling and maintaining optimal moisture.
Step 10: While the cakes cool, beat together the softened cream cheese and butter in a bowl until fluffy.
Creaming together these fats incorporates air, making the frosting light and spreadable. This assures that your frosting will not be heavy and will complement the delicate cake layers.
Step 11: Gradually add powdered sugar and mix until well combined, then add the vanilla extract and beat until smooth.
Adding powdered sugar gradually helps control the sweetness and avoids an overly gritty texture. This creates a velvety frosting that smoothly envelops your cake.
Step 12: Once the cakes are completely cool, place one layer on a serving plate and spread a generous amount of frosting on top.
Layering frosting ensures that each slice offers a delightful mix of cake and frosting. Be generous; the cream cheese frosting is rich and adds to the moisture of the layers.
Step 13: Top with the second cake layer and frost the top and sides of the cake with the remaining frosting.
Frosting the sides neatly helps create a professional finish while sealing in moisture. Feel free to smooth it down or create decorative swirls for added appeal.
Step 14: Add any optional garnishes, such as sprinkles or chocolate shavings, and serve.
Decorative elements enhance the visual presentation of your cake and provide additional texture. They can also spark conversation and excitement about the cake’s flavors.

The Significance of Buttermilk
Buttermilk is more than just a tangy ingredient; it plays a crucial role in the overall flavor profile of red velvet cake. The acidity reacts with the baking soda to create a tender texture while adding a subtle depth that enhances the cake's taste. This ingredient is also responsible for preventing a dry cake, ensuring every bite remains moist and satisfying.
Choosing the Right Cocoa Powder
When selecting cocoa powder for your red velvet cake, quality matters significantly. Opt for Dutch-process cocoa for a smoother and richer chocolate taste, which will complement the buttermilk's tang and the cake's natural sweetness. This choice helps achieve a well-balanced flavor that doesn't overpower the cake, allowing the signature red velvet taste to shine through.
Decorating the Red Velvet Cake
Once you've baked and frosted your red velvet cake, it's time to let your creativity flow. Simple designs can elevate your cake's appearance, making it a centerpiece for any gathering. Consider incorporating fresh berries or edible flowers on top for color, or utilize a stencil for decorative cocoa powder dusting. Keep in mind that presentation enhances the cake's allure, making it even more enjoyable.
FAQs
What can I do if my cake becomes too dense?
If your red velvet cake turns out dense, it may be due to overmixing the batter. Ensure you mix until just combined. Additionally, check if you correctly measured your ingredients, as too much flour can lead to a heavy texture.
Can I make a layered red velvet cake with cream cheese frosting?
Absolutely! This recipe is perfect for layering. Just ensure each layer is leveled before stacking to maintain balance and stability.
Why is my cake not red enough?
If your red velvet cake lacks vibrancy, it could be due to insufficient food coloring or using a cocoa that’s too dark. Don’t hesitate to adjust the coloring to your preference.
What can I substitute for buttermilk?
If you don’t have buttermilk on hand, mix 1 cup of milk with 1 tablespoon of vinegar or lemon juice and let it sit for a few minutes until it curdles. This homemade version works effectively.
How do I achieve a smooth frosting on my cake?
To create a smooth frosting, make sure both your cream cheese and butter are at room temperature before mixing. This helps achieve an even consistency and makes spreading easier.
What will happen if I skip the cocoa powder?
If you skip the cocoa powder, your red velvet cake will lose its characteristic slight chocolate flavor, and the color may not be as rich as intended. It's a key ingredient for flavor and visual appeal.
Conclusion
Baking a red velvet cake is more than just following a recipe; it’s about creating a beautifully unique dessert that holds sentiment and celebration. With its balance of flavors, it remains a favorite for any occasion.
By understanding the key ingredients and techniques involved, you can master this classic treat and bring joy to your table. Enjoy your baking adventure, and relish in the delight that each slice brings!
Recipe Card
Exploring the Depths of Red Velvet Cake Flavor
Ingredients
Method
- Preheat your oven to 350°F (175°C).
- Prepare your cake pans by greasing them and placing parchment paper at the bottom.
- In a large bowl, sift together the flour, cocoa powder, baking soda, and salt.
- In another bowl, whisk together the oil and sugar until well combined.
- Add the eggs, buttermilk, food coloring, and vanilla extract to the oil mixture, mixing until smooth.
- Gradually add the dry mixture to the wet ingredients, mixing until just combined.
- Divide the batter evenly between the prepared cake pans.
- Bake in the preheated oven for 25-30 minutes, or until a toothpick inserted comes out clean.
- Let the cakes cool in the pans for 10 minutes, then turn them out onto wire racks to cool completely.
- While the cakes cool, beat together the softened cream cheese and butter in a bowl until fluffy.
- Gradually add powdered sugar and mix until well combined, then add the vanilla extract and beat until smooth.
- Once the cakes are completely cool, place one layer on a serving plate and spread a generous amount of frosting on top.
- Top with the second cake layer and frost the top and sides of the cake with the remaining frosting.
- Add any optional garnishes, such as sprinkles or chocolate shavings, and serve.
Notes
Additional serving suggestions: pair with a crisp salad, garlic bread, or roasted seasonal vegetables for balance.
For make-ahead, prep components separately and assemble just before heating to preserve texture.
Taste and adjust with acid (lemon/vinegar) and salt right at the end to wake up flavors.